Related downloads


Printable Origami Swan Guide
If you’re looking for a fun rainy day activity to do with the little ones this weekend, why not go back to basics with the ancient art of origami?
With our simple guide to creating your own paper swan, you can switch off the TV and get the whole family to sit down together creating something different!
With just a few simple folds, you will soon be able to transform a sheet of paper into an elegant swan. Our guide is perfect for origami beginners and even little hands can join in with supervision. Who knows, once you’ve mastered the swan, you may soon have your own miniature menagerie of paper pets!
Click here to download and print your guide. If your printer is need of some ink, we offer free, next-day delivery on all orders.

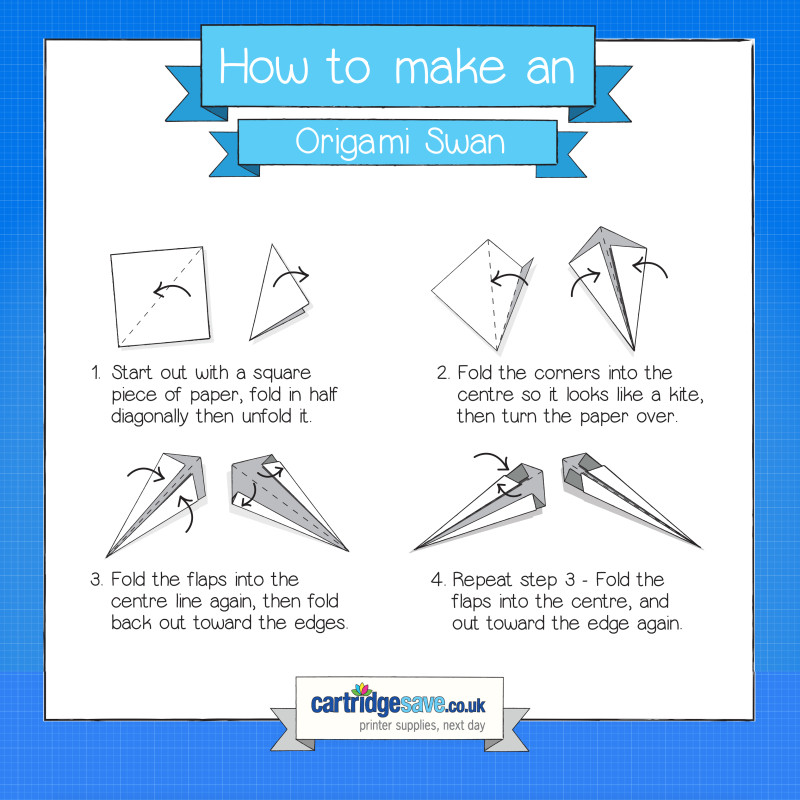
How to make an Origami Swan
Step 1: Start out with a square piece of paper, fold in half diagonally then unfold it
Step 2: Fold the corners into the centre so it looks like a kite, then turn the paper over
Step 3: Fold the flaps into the centre line again, then fold back out toward the edges
Step 4: Repeat step 3 – Fold the flaps into the centre, and out toward the edge again
Step 5: Fold the bottom of the ‘kite’ upwards, to make the swans neck
Step 6: Fold the tip of the neck down to make the swans head
Step 7: Fold the swan in half vertically
Step 8: Pull the neck of the swan away from the body.
Download ← Back